Here it is, my first video tutorial. I plan on doing a handful of these, and this one is basically a test to see how it looks all edited and uploaded. Looking back I think it was a moderate success, but I promise the next one will be more informative & entertaining. Until then...
TUTORIAL: Masking with Paint
Afterwords, here's the mask I made for some of the details (you can see the bottle of wine wasn't actually done on it's own, I just did that to show you how to do individual masks):
 | |
Which ends up looking like this:

And for some stuff it's not necessary to create the same shape over & over, you can create it once and use that to 'stamp' those shapes to the canvas:
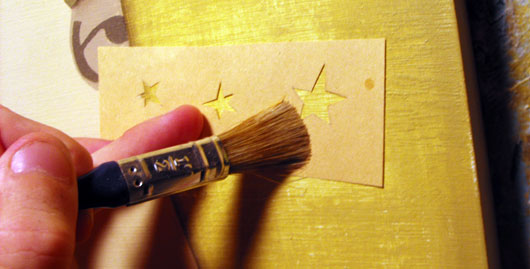
Although, be warned that the more of the same shape you have, the boring-er your picture will end up. You may be able to hide the fact that it's the same shape by flipping/rotating/changing colour, but your picture will always feel a little homogeneous. Plus, the more you re-use the same shape, the fewer happy accidents you'll encounter.
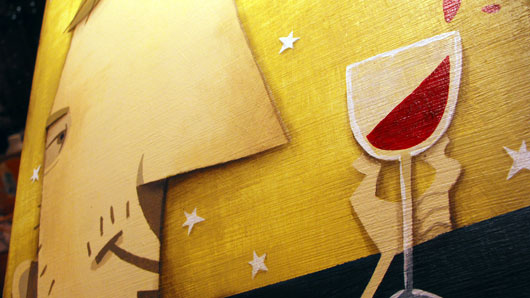
And here you can see why this technique is valuable in the first place. Look at those crisp sharp edges created with a minimal amount of
careful painting. Most of those sharp edges were created with broad brush strokes over my masked surface. You can also see how the background around the character (like the shadow under his nose) can be added afterwords with the reverse-mask I mentioned in the video.
Here's a few shots of the finished artwork:
   
|